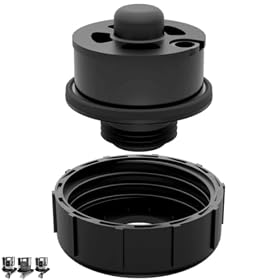
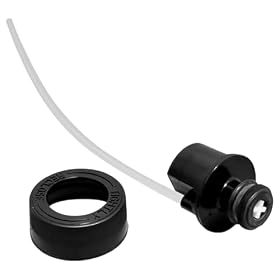
A worn or missing clean-tank cap seal can make a carpet cleaner leak, lose pressure, or leave the tank difficult to secure. Here is how to identify the right replacement and install it without damaging the tank or seal.
A spare clean-tank cap seal is usually worth buying when the original gasket is cracked, flattened, stretched, missing, or no longer keeps the tank watertight. The important detail is compatibility: seals that look similar can differ in diameter, thickness, material, and seating shape. Match the seal to the exact carpet cleaner model and tank design before ordering.
What the clean-tank cap seal does
The cap seal, gasket, or O-ring sits between the clean-water tank and its cap or valve assembly. It forms a watertight connection so the tank can hold cleaning solution while the machine sprays or extracts.
A damaged seal may cause:
Clean water or formula dripping from the tank
A puddle beneath the cleaner during filling or use
Reduced spray performance if the tank cannot maintain the intended seal
A cap that feels loose or will not seat correctly
Air entering the tank or valve area
A seal that sticks to the cap, twists, or falls out during installation
A leak does not always mean the seal is bad. The cap may be cross-threaded, the tank may not be seated correctly, or debris may be preventing the gasket from lying flat.
Check the exact carpet cleaner model first
Look for the model number on the cleaner body, rating label, owner’s manual, clean-tank label, or original packaging. Some manufacturers use different clean tanks and cap assemblies across machines that look nearly identical.
Before buying, compare:
The complete model number, including letters or suffixes
Whether the part is for the clean-water tank rather than the recovery tank
Whether the listing identifies a cap seal, tank gasket, O-ring, or complete cap assembly
The shape of the original seal and its seating groove
Any manufacturer part number printed on the old seal, cap, tank, or manual
Do not rely on a product photo alone. A round O-ring may look correct but still be too thick to let the cap close or too thin to prevent leaking.
Product prices and availability are accurate as of the date/time indicated and are subject to change. Any price and availability information displayed on Amazon.com at the time of purchase will apply to the purchase of this product.
OEM versus generic replacement seals
An original-equipment seal is generally the lower-risk choice when it is available for your exact model. It is more likely to have the intended dimensions and material for the tank cap.
A generic seal can work if its dimensions, cross-section, material, and shape match the original. Check the seller’s compatibility information carefully rather than choosing only by outside diameter. For some caps, the seal is a molded gasket or flat washer instead of a conventional round O-ring.
Be cautious with listings that:
Claim compatibility with many unrelated machines but provide no dimensions
Show several different seal shapes in one image
Do not identify whether the seal fits the clean tank or solution cap
Use vague terms such as “universal carpet cleaner gasket” without a model list
Offer a replacement that is visibly thicker, thinner, or differently shaped than the original
Product prices and availability are accurate as of the date/time indicated and are subject to change. Any price and availability information displayed on Amazon.com at the time of purchase will apply to the purchase of this product.
How to inspect the old seal
Unplug the carpet cleaner and remove the clean tank before inspecting it. Empty and rinse the tank if it contains solution.
Look for:
Cracks or splits: Small cuts can open when the cap is tightened.
Flattening: A compressed gasket may no longer spring back into the sealing groove.
Stretching: An O-ring that has become larger may buckle or twist.
Hardening: Old rubber can become stiff and stop conforming to the cap.
Chemical swelling: Some cleaning formulas can affect materials that are not suitable for them.
Debris or residue: Dried formula can hold the seal away from its seat.
Deformation: A section that is pinched, folded, or uneven can cause a localized leak.
Clean the cap and groove with warm water and a soft cloth. Avoid sharp tools that can scratch plastic sealing surfaces. If the seal looks intact and the leak stops after cleaning and reseating it, a replacement may not be necessary yet.
Product prices and availability are accurate as of the date/time indicated and are subject to change. Any price and availability information displayed on Amazon.com at the time of purchase will apply to the purchase of this product.
Choosing the right replacement
Use this order of preference:
1. Match the model number
This is the most reliable way to narrow the part. Confirm that the replacement is specifically listed for your cleaner and clean-tank cap.
2. Match the seal type
Determine whether the original is:
A round O-ring
A flat rubber washer
A molded lip seal
A shaped gasket integrated with a cap or valve
A conventional O-ring is not a substitute for a molded seal unless the cap is designed for it.
3. Compare dimensions only when necessary
If a model-specific part is unavailable, measure the old seal carefully. Useful dimensions can include outside diameter, inside diameter, and cross-section thickness. Measure an undamaged area and do not stretch the seal while measuring.
For a flat gasket, also compare the overall shape, openings, thickness, and locating tabs. A close measurement is not enough if the replacement cannot sit flat in the cap.
4. Confirm material compatibility
The seal should be made for contact with water and the cleaning solutions recommended by the carpet cleaner manufacturer. Avoid substituting unknown rubber, foam, or household plumbing washers. The wrong material may swell, soften, harden, or deteriorate after exposure to detergent.
How to replace the cap seal
Follow the carpet cleaner’s manual if it gives model-specific instructions. In general:
Unplug the machine and remove the clean-water tank.
Empty and rinse the tank.
Remove the old seal without cutting or gouging the cap.
Clean the groove and cap with warm water and a soft cloth.
Inspect the cap and tank neck for cracks, chips, or distortion.
Place the new seal evenly in its groove. Do not twist or stretch it unnecessarily.
Refit the cap by hand. Avoid forcing or cross-threading it.
Fill the tank with clean water only and check for leaks over a sink or towel.
Reinstall the tank and perform a short test according to the manual.
Do not apply petroleum jelly, grease, glue, or sealant unless the manufacturer specifically permits it. Lubricants can damage some seal materials or allow the gasket to move out of position. If lubrication is recommended, use only the specified product and amount.
If the replacement still leaks
Check the simplest causes before assuming the new seal is defective:
Confirm that the seal is in the correct groove and is not twisted.
Make sure the cap is fully closed but not overtightened.
Remove dried formula, lint, or grit from the sealing surfaces.
Check that the tank neck is not cracked or chipped.
Look for a warped cap or damaged valve seat.
Verify that the tank is the correct one for the machine.
Test the tank with water outside the cleaner before adding formula.
If water leaks from a crack in the tank, a damaged cap, or a valve assembly rather than around the gasket, replacing only the seal will not solve the problem. A compatible replacement tank or cap assembly may be needed. If the machine leaks near wiring, the pump, or the motor, stop using it and have it inspected by a qualified repair professional or follow the manufacturer’s service guidance.
When a replacement unit makes more sense
A seal is a sensible repair when the cleaner is otherwise operating normally and the tank, cap, valve, hose, and electrical parts are sound. Consider replacing the tank or the entire machine when several plastic parts are cracked, replacement parts are unavailable, or repair costs approach the value of a comparable cleaner.
Always use the cleaning formulas and replacement parts specified by the manufacturer. Unplug the machine before removing tanks or performing maintenance, and keep electrical connections away from water.
How do I know whether I need a clean-tank cap seal?
Inspect the gasket for cracks, flattening, stretching, hardening, or distortion. If the tank leaks around the cap after the sealing surfaces are clean and the cap is correctly installed, the seal is a likely replacement part.
Can I use a universal O-ring for a carpet cleaner tank?
Only if its dimensions, shape, material, and seating arrangement match the original and the manufacturer’s requirements. A generic O-ring that merely looks similar may leak or prevent the cap from closing correctly.
Should I replace the cap and seal together?
Replace only the seal if the cap and tank neck are undamaged. A cracked, warped, cross-threaded, or damaged cap may require a complete cap assembly even with a new gasket.
Can I use petroleum jelly on the clean-tank seal?
Do not use petroleum jelly unless the manufacturer specifically says it is compatible. Some seal materials can be damaged or displaced by unsuitable lubricants; follow the manual’s maintenance instructions instead.
Why does my new clean-tank seal still leak?
The seal may be twisted, the wrong size, or incorrectly seated. Also check for debris, a damaged tank neck, a warped cap, a cracked valve, or a tank that does not belong to the cleaner.